We understand the world of social analytics is getting more intense by the day so we thought we’d break down one more way to really track what’s happening on your social channels and how each post or tweet can relate to your web visitors. In a nutshell, UTM parameters on Google Analytics can get these details for you but if you’re like me I couldn’t even tell you what UTM stands for [yesterday].
So first things first, what does UTM Parameters even mean?
The basic definition is that UTM parameters are simply tags you add to a URL — when your link is clicked, the tags are sent back to Google Analytics and tracked. With UTM parameters, you can tag your links to gauge the effectiveness of your campaigns and identify the best ways to drive more visitors to your website.
And why would you even use these?
Because you love analytics! But also, to track the actual tweet or post that drove your traffic back to your website. This can be extremely important if you are running a campaign; let’s say “Summer Sizzle 2015” is a campaign you are kicking off. You would want to create a UTM parameter for your link so that you can track which visitors to your site came from this particular content.
Overall, this tracking method can help tracking and analyzing for many different reasons, including:
- Accurately track specific promotions, and learn what works and what doesn’t.
- Determine how specific ad sizes perform in terms of site traffic.
- Understand which Twitter or Facebook copy is driving the most traffic and revenue.
- Understand the differences between what the ad dashboards report versus your own site analytics.
Practical eCommerce
But what’s wrong with the analytics I get from Facebook and Twitter?
The analytics on Facebook and Twitter are great but you won’t see how that traffic actually interacts on your site. And if you’re concerned about other metrics (as you should) — such as time on site, number of pages viewed, and bounce rate — you won’t be able to find them in those dashboards. Overall this method will help you really see what’s driving to your site and hopefully get you closer to seeing what your Social ROI is.
Practical eCommerce
Alright, so how do I set up my URLs?
First things first, you can use Google’s free URL Builder tool to create your UTM Parameter URL’s quickly and easily. If you’re looking for examples of where to use various UTM parameters we love the breakdown in the Kiss Metrics blog 10 Examples of Useful UTM Parameters (halfway down the post).
Google’s URL builder helps you add parameters to URLs you use in custom web-based or email ad campaigns. A custom campaign is any ad campaign not using the AdWords auto-tagging feature. When users click one of the custom links, the unique parameters are sent to your Google Analytics account, so you can identify the URLs that are most effective in attracting users to your content. Simply fill out the form, screenshot below, and click GENERATE URL to create URLs for Custom Campaigns for website tracking. The form will return a URL you can then copy and paste as your links.
You will also see a bit more information and a breakdown of the various options:
Practical Ecommerce’s blog broke this down recently extremely well so we thought we’d share below:
Implementing your link is as simple as using it for the first time in the ad platforms,. Just use the full UTM link as the website source when you’re creating your campaign. Keep these two tips in mind, however.
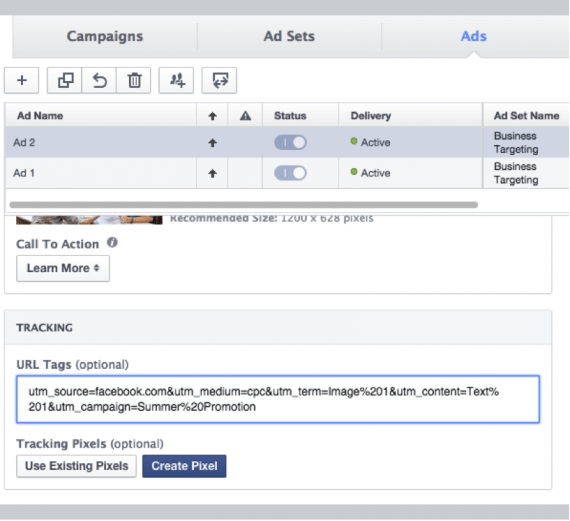
First, in Facebook, just add the domain and then add the UTM codes after you create your ads. But there’s a catch. This can only be done in Power Editor. To do this, open Power Editor, select the ad, and then scroll down to the “Tracking Section,” where you’ll see the empty box beneath “URL Tags.” Paste the UTM code there.
Second, with Twitter, I always use a link shortener, such as bit.ly or a goo.gl, so that my links look cleaner, and I can see the number of clicks on the link. providing three layers of tracking. Just one thing with the link shorteners: You can shorten links without being signed in; make sure you are signed in so you can view the data easily and in one place.
Where do I find the analytics once I’ve launched?
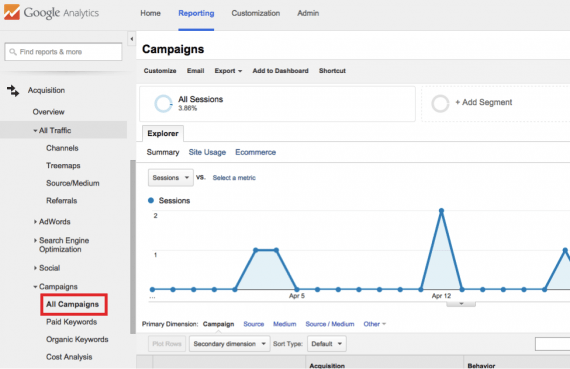
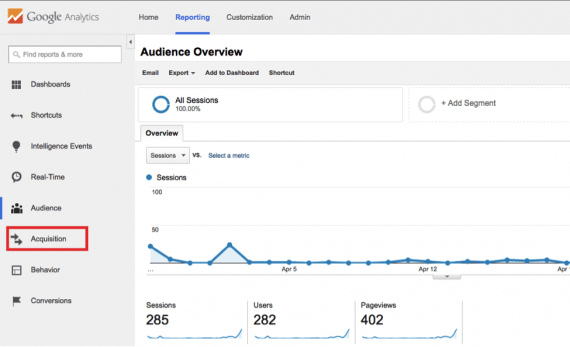
Here’s the fun part: viewing the data in Google Analytics. Log in to Google Analytics, select your site, and simply click on the “Acquisition” tab.
From there, the tab will expand, revealing “All Campaigns” at the top. Click that. If everything is set up correctly, you should see your data.
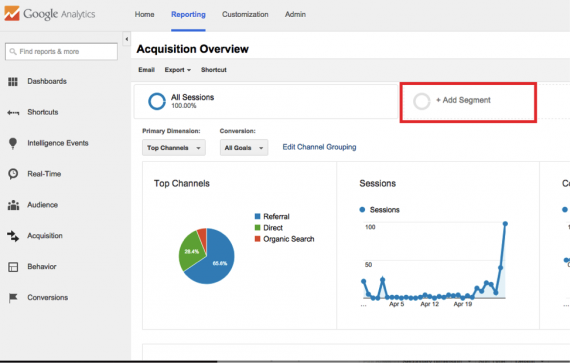
You’re able to see how that traffic interacts with everything on your site by creating an advanced segment. This is how I view my campaign data. There is so much potential here. Here’s how to set it up.
From any view in Google Analytics, click on “+Add Segment.”
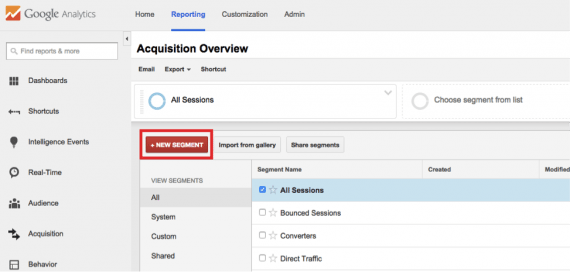
Next, click on “+New Segment.”
Enter all the information from the UTM link you created. If you’ve received visits from your link, this data will auto-populate. You can be as broad or as specific as you’d like. For example, you could just enter the “source/medium” and “campaign,” allowing you to see all the ads as one per source. Conversely, you could just add the campaign name, letting you see performance by all mediums.
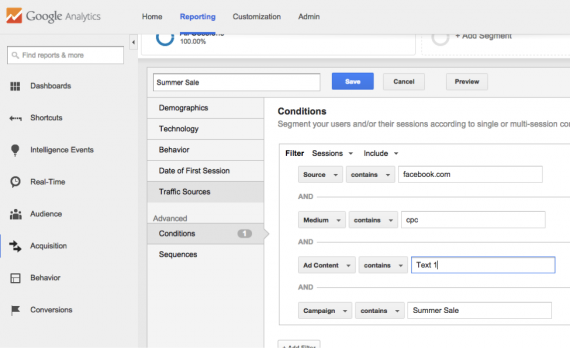
Once you’re satisfied with your segment, click “Save” and your segment will be applied, allowing you to view performance of that traffic in any Google Analytics section that supports advanced segments.
The insight you’ll gain from tracking all activities and campaigns will pay off many times in understanding what ad copy drives the most sales, what sites send the best traffic, and what content to create next that will be the most shared.
Setting Goals
Make sure you always set up goals for any of your campaigns, some help from google here. Create a new Goal by navigating to your Goals in your Google Analytics account:
- Sign in to Google Analytics.
- Select the Admin tab and navigate to the desired account, property and view.
- In the VIEW column, click Goals.
- Click + NEW GOAL or Import from Gallery to create a new Goal, or click an existing Goal to edit its configuration.
- You will have 2 basic options for creating Goals: using a Goal template or creating custom Goals
Once you are ready to configure your goals, you will go through the following steps:
- Goal name: It’s a good practice to name your Goals in a way that helps you distinguish one Goal from another. This can help make your Goal Conversion and Flow reports more easily understood.
- Goal slot ID: Every Goal you create is assigned a numeric slot ID. You can have a maximum of 20 Goal slots, grouped into sets of up to 5 individual Goals. Goal sets allow you to categorize the different types of Goals for your site.
- Goal types: As described in About Goals, there are a number of different Goal types, each used for a different kind of action you can measure. If you use a template, the best fit will be suggested for you. If you set up a custom Goal, select the type that best fits the action you need to track. Expand the sections below to learn more about the details of each Goal type.
- Goal value: Assigning a monetary value to a Goal gives you a way to compare conversions and measure changes and improvements to your site or app. You assign a value during the setup process. There are special considerations when setting up an Event Goal or a Goal that involves Ecommerce Tracking. Expand the sections below to see these considerations.
- Verify your Goal: Click “Verify this Goal” to test your Goal setup. This will calculate a conversion rate for this Goal based on your data from the past 7 days.
- Revise or Edit a Goal: You can revise a Goal you are in the process of defining by clicking the “Edit” link next to a previous step.To edit an existing Goal, navigate to the Goals list and click the Goal name to follow the step by step flow again.
One last helpful tip
Keep track of your UTM parameters so you are following similar formats between campaigns. You can always do this in a shared google doc so that others in your organization can see this and also reference previous URL’s.